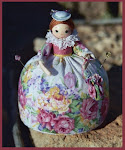
I should be wrapping packages, or putting up the fake tree, but I didn't feel like it today. I was thinking about my mother and how she always wore a Christmas corsage. She was good at arranging greens and table decorations, maybe she created the corsages herself. They were usually made with holly leaves, red berries, maybe some evergreen twig, and little white bells that looked like sugared Easter eggs. I wish I could find those bells today! Lulu always looked cheerful and upbeat during the holidays.
So instead of doing something practical today, I made a Christmas corsage! Not quite like the ones Lulu wore, which I wish I could reproduce, but it was fun to be in my studio and I like the whimsical finished product. Did I go to far? There is a lot of stuff in it -- pine cones and seed pods, tiny bells, leaves and a vintage red blossom, paper rose, stamens, feathers, even cats whiskers! (I knew I was saving them for something.)
Wednesday, December 22, 2010
Tuesday, December 14, 2010
Morning Glories by Studio Door
I planted morning glories in two large planters on each side of my studio doors. They climbed up the strings and down, over the doors, and up and down the opposite side. There was much foliage, but no blossoms! It was so hot and dry this summer, they baked in the afternoon sun. I watered them like crazy. Then this fall, after most of the foliage was gone, the morning glories started to bloom, and there was no stopping them! They bloomed until I pulled them out two weeks ago to string Christmas lights around the studio doors.
Some of the blooms drooped down in front of the door. Here is Charlie wearing a live morning glory blossom behind his ear.
Friday, December 10, 2010
Fooling around with Photoshop Elements
When we were home in September we went up to the farm to visit John and Linda. Wow, their gardens are so beautiful, flower and vegetable! The next day we met them on Mt. Greylock (?) and Linda had picked a bunch of beautiful raspberries for us. I remember going up to the farm 40 years ago to pick berries in Mary's big, productive berry patch. Mmmm.
In Linda's garden I took a photograph of these phlox with part of an old machine sitting on a rock. It was a nice juxtaposition. When I came home I had HUGE problems with my old computer, and eventually decided to get a new one. Now I have to learn all new programs and software. It isn't easy. Since this photo didn't turn out so hot, I thought I would fool around with it in PSE. Wow, you can do a lot of fun things with a photo in this program.
Various "effects" I tried were: watercolor, sprayed strokes, Pointilist, mezotint, and grainy- speckled. I think I like watercolor (first one) and grainy-speckled (last one).
Thursday, December 9, 2010
Autumn Arrangement
It isn't really much of an arrangment. Charlie brings home the flowers and I just kind of plop them in an appropriate size vase.
Charlie likes going to the Farmers' Market on Saturday mornings and buys delicious local produce, preserves and baked goods in season. Sometimes he brings flowers home for me too! This bouquet, picked in October, had several stemmed okra pods in it! That I had never seen in a bouquet, but they looked very pretty. And it sure beats eating the stuff!
Friday, August 6, 2010
The "Regrettable List"
Carolyn and I found a wonderful needlework shop in Lyon, France! The owner has designed most, if not all, of the needlework patterns and kits in the shop. There was a very cute embroidered wall piece, sort of a reminder board of things to do.
Later I mentioned something I thought should go on my "life list." Then Carolyn and I got to talking about how trendy "life lists" are. We decided that we would each make a craft project with the theme being "regrettable list." That is, it would include some of those things that, when you get to the end of your life and you haven't done them, you're gonna regret it!
So, here is my craft project. (I don't think Carolyn has started her's yet, but she has an idea for designing something in felt.)
I covered a glass jar (peanut butter!) with blue tissue paper. I found a picture of an old clock in a magazine and copied it on my copier. The lettering on the jar was all done on my computer, in Microsoft Word. I have an old version of Word, probably the newer ones do even more. There is a button you can click on called "Word Art," and you can fool around with your text in lots of ways. The font is "Emma Script" which I found on the internet. It used to be featured in Mary Englebreit's magazine. You have to pay for it, it's not one of the free fonts.
The neck of the jar was embellished with beads and little birds I bought a long time ago (I never throw any potential craft material away).
Each plastic straw has a flag at the top. The flags say things like: "piano, records, letters, hammock" and lots of other things I don't think I have time to do, or haven't got around to doing yet. So, every day (hopefully!) I will pick a straw out of the jar, and whatever the flag says I will go do that for 15 minutes! Afterall, 15 minutes of piano playing is better than none at all.
I thought about using narrow dowels instead of straws, but the straws were faster. Painted dowels would be cute, with the flags glued on.
The flags were also made on the computer, in Word. I simply cut the top of the straw and inserted the flag.
Wednesday, July 14, 2010
Clark's O.N.T. Thread Cabinet
The studio is my new house is almost finished, and it is looking very adorable! (I still have to paint some trim and decorative shelves; can't figure out why Charlie doesn't want to do that for me.)
I recently traded with a friend who had a Clark's O.N.T. Spool Cotton cabinet stored in her old house. After a little cleaning and finishing, it was as good as new, when it might have resided in the sewing corner of a small town general store somewhere. (Like H. D. Reynolds General Merchandise, the store we depended on growing up in Cheshire, Massachusetts.)
Here is the Clark's O.N.T. (what did that stand for? - click here) cabinet as you walk in the front, double French doors of my studio. Beyond the thread cabinet is my always messy work table, so the cabinet has a dual function of covering up my messy work space, as least from the front door.
The top of the cabinet lifts up to reveal a shallow storage space. I wonder what this space was used for -- patterns? advertising? I used the space to dispay some of my collection of antique sewing notions. Carolyn gave me the cute little Hoover vacuum measuring tape!
It's so nice not to have my thread stored in several cigar boxes, by color. It was a pain to thread up the sewing machine when I had to dig around for threads and matching bobbins. Now they are all in one place, what a luxury! I have already used my sewing machine two times!
In fact, there is so much room in these long drawers that my threads only took up space in three of them. So I put more antique notions in the one empty drawer.
Friday, May 7, 2010
Miss Hickory Doll, Pattern, and Instructions
When my daughter was young we read, several times!, a wonderful book called Miss Hickory by Carolyn Sherwin Bailey. It was a Newberry award winner in the late 1940's, I think. The story is about an independent minded little doll, made from a hickory nut and applewood twig, who must fend for herself when the dollmaker and her family leave cold New Hampshire and go 'south' to Boston for the winter. Though she is independent and feisty, Miss Hickory learns to gracefully accept help from crow, squirrel, cat and other friends.
It took me 35+ years, but at long last I have created a Miss Hickory Doll! I think she matches pretty well the charming book illustrations by Ruth Gannett and the spirit of the character portrayed by Carolyn Sherwin Bailey.
In the next several posts I will give instructions for making your own Miss Hickory doll. But, you must read the story first!! That will surely influence your characterization of the doll.
Thanks to Salley Mavor for allowing me to present my version of a type of doll she has been making for many years. Salley has illustrated several children's book with her "stumpwork" fabric art, as well as presenting patterns and instructions for her charming little "Wee Folk" dolls.
Miss Hickory - Pattern & Instructions - Part 1
The doll's skeleton is made from four 6" pipe cleaners (which I find in, cough cough, tobacco and cigar shops; they are also sometimes generous with nice wooden cigar boxes!). One 6" cleaner forms the neck and bodice. A second one forms the two arms. Two more pipe cleaners form Miss Hickory's somewhat tall and lean legs. Measurements are given in the illustration below. (You should be able to click on it to enlarge.)
Loosely form the skeleton following the measurements above. The shoulders to the thighs will be firmly covered with bias tape, which will fill out the bodice and hold the pipe cleaner skeleton together.
Glue (Tacky glue is used on all parts of this project) the end of a long piece of bias tape to the back of the pipe cleaner torso just under the shoulders. Wrap the shoulders and torso with the bias tape, then the upper legs, then the torso again. Cut and glue the end on the back. This bias tape will not show under Miss Hickory's costume.
Hickory nuts come in a variety of shades of brown. I try to match the embroidery floss and bias tape to the color of the hickory nut. (See Part 4 for the hickory nut head, which goes on last, after all the clothes have been fitted and applied.)
Miss Hickory - Pattern & Instructions - Part 2
Glue end of a long piece of embroidery floss to the back of the bodice. After that dries, spread a small amount of glue on back of neck and wrap the floss up and down the neck (glue holds wraps in place). When you get to the shoulder area, spread a thin layer of glue on the front of the bias tape. This is important to keep the wraps smooth.
After shoulder is finished start wrapping one arm. Wrap all the way to the tip. Bend hand back about ¼” and wrap back up the arm. (See TIP elsewhere in the instructions.)
Remember when you are wrapping that Miss Hickory is made of an applewood twig, so her limbs will be skinny. Extra wrapping is not necessary. Unevenness and bumps, like a twig, are ok too!
Repeat on second arm, wrapping up to the tip, forming hand, and back to the top of arm. Glue floss to back of bodice, wait until it dries, and carry the floss down to the legs, just below the bias tape. (If it is easier for you to work with shorter lengths of embroidery floss – I work with the whole skein – you can wrap the top part of the doll, then with another piece the lower part of the doll.)
Wrap the embroidery floss down one of the legs to the ankle, about 1” from the end, then back up the leg and over to the other leg. Repeat, cut floss, and glue.
To make socks or boots, glue end of a different color of embroidery floss to the back of the lower leg. Start wrapping the new floss ½” above the ankle, over the lower part of the already wrapped leg. This makes it really look like socks or boots. Change the color another time to make the shoes a different color still.
Bend the tip of the covered pipe cleaner back about ½” to form the foot. Wrap back up the foot and lower leg. Put a dab of glue on the back of the leg where the ‘sock’ ends. When glue is dry, cut the extra floss. The lower leg should look something like this:
Miss Hickory - Pattern & Instructions - Part 3
Clothing for Miss Hickory. For the skirt, take a fabric flower apart. (Daisy-like flowers with many petals seem to work best, fewer petals need a little finessing.) Cut into the center of one of the layers of petals. You will also need to cut the hole bigger, to fit the doll’s waist.
Run a gathering thread at the waist near the edge (approximately 1/8”). Pull up thread, fit slightly below dolls waist, and tie off. Add a little glue there to hold in place. Let dry. Add a second layer of petals in the same way, this time at waist level.
On all the edges that will not be seamed, I make a decorative buttonhole stitch, using one strand of floss. Do this before you sew the front and back together. Sew the shoulders and one side seam together with a small overcast stitch. Put the vest on the doll and sew the remaining side seam while the vest is on the doll.
Next, the head and accessories (hat and shoes).
Vest. Lay doll on a piece of paper towel. Draw around the bodice to make a pattern, adding an extra ¼” or more to make it fit around the body. Cut two matching pieces from the paper towel. Try your pattern on the doll, pinning at sides and shoulders. (You can pin it right to the doll, it’s too hard to try to pin the seams together!) You may have to adjust the pattern a couple times to get the fit right. When the fit is correct, cut two matching pieces from good quality felt.
My messy desk:
My messy desk:
Embroider a couple flowers on the front of the vest, using one strand of floss and the lazy daisy stitch.
On all the edges that will not be seamed, I make a decorative buttonhole stitch, using one strand of floss. Do this before you sew the front and back together. Sew the shoulders and one side seam together with a small overcast stitch. Put the vest on the doll and sew the remaining side seam while the vest is on the doll.
Next, the head and accessories (hat and shoes).
Miss Hickory - Patterns & Instructions - Part 4
Miss Hickory’s head, face and accessories. Collect a bunch of hickory nuts. Let them dry in the sun, then peel off the outer shell. I say collect a bunch because they won’t all work. Sometimes you can’t get the outer shell off, or they may be stained, or too fragile.
When you get a good one, make a hole in the bottom with a utility knife, whirling the point around until the hole is big enough. Be careful; if you are working with a child this part should be done by an adult.
The hole may not be perfectly round, or centered. That’s ok, it just needs to be big enough for the pipe cleaner neck to fit. And if it is not centered, the doll’s head can tilt quizzically. Miss Hickory was a curious little doll!
Drop a blob of glue into the hole in the hickory nut, and push neck gently into hole. (Hickory nuts can be quite fragile.) Let dry thoroughly.
Take apart tiny fabric flowers. Apply glue in a ring around head and attach flowers. Let dry thoroughly, then glue some beads into the flower centers. Repeat on tops of shoes.
Maybe I shouldn’t, but I always leave the face painting for last. It seems that the doll tells me what kind of face it should have only after it is completely dressed.
Because hickory nuts are somewhat dark, you will have to apply white paint for the eyes, in an oval. I used an acrylic paint. When dry, the rest of the face painting is done with Micron Pigma Pens, both .005 and 1.0 sizes, in black and colors. Quilt shops and art supply stores usually carry these. Let face dry completely.
Pose Miss Hickory with her book. When you are reading the book to children, you can pass the doll around for them to hold while listening, imagining…..
Monday, February 22, 2010
Altered Book Nature Journal
In April and May I will be teaching a 4-part workshop on making an 'altered book nature journal' at Strawberry Plains in Holly Springs. Dates for the four classes are April 3 and 17, and May 1 and 15. Here are a few photos of a previous altered book I made.
Some of the techniques we will be learning are: making pockets and tags, windows and 'portholes,' tipping in pages and envelopes, attaching mini books to pages, weaving pages together, masking & painting, etc. We'll do a lot of painting, stamping, stenciling, and pasting.
I have a lot materials and supplies I will bring to the workshops, things like tissue papers, paints, paper punches, rubber stamps, some ephemera.
Class participants should also start gathering bits and pieces -- plain & decorative tissue papers, thin pieces of bark, such as birch, nature photographs and nature magazines, used printer paper (blank on one side). Your book should be a hard cover, and of a good quality paper. Do not choose a very old book.
To visit my Flickr Altered Book Sets click here. And here.
Monday, January 25, 2010
Knitted Camera Cozy
Well, this blog has been silent for FAR TOO LONG! My fault really - Mom has been ridiculously busy moving and, well, Carolyn always has a full plate. Oh, and my computer died a horrible death, taking many pictures saved on my hard drive with it to the "other side". So, here I am with a new laptop and a little contribution to get my blogging skills warmed back up. Many more fun things to follow.
My parents move had a great perk for me - it allowed me to buy a digital camera! Hurray - thanks Mom and CC. But, of course, it needed a cozy. 'Cuz I can wrap just about anything in yarn :). My yarn drug of choice - Malabrigo - fiber crack. Amazing colors, the softest, softest stuff. I used their Lace baby merino for this project - it was already in my stash. Found a lovely free pattern on Ravelry - thanks Janelle! I think that's enough hyperlinks for one post...
Here's the finished project:
Funny thing: when you make a camera cozy, you can't take a picture of it on your camera. It's a Schrodinger's cat sort of thing. Just trust me when I say it fits perfectly. It's for a Canon SD1200 - I held the yarn double and cast on 28 sts on size 2 needles and increased to 36 sts per the pattern. I switched to size 1 needles for 10 rows of ribbing. Ta-da! Now, to use the camera on my Winter Train Adventure - pictures to be posted on the WEBBLOG next month! Last hyperlink, I swear...
Subscribe to:
Posts (Atom)