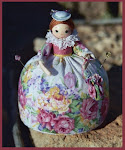
 The doll's skeleton is made from four 6" pipe cleaners (which I find in, cough cough, tobacco and cigar shops; they are also sometimes generous with nice wooden cigar boxes!). One 6" cleaner forms the neck and bodice. A second one forms the two arms. Two more pipe cleaners form Miss Hickory's somewhat tall and lean legs. Measurements are given in the illustration below. (You should be able to click on it to enlarge.)
Loosely form the skeleton following the measurements above. The shoulders to the thighs will be firmly covered with bias tape, which will fill out the bodice and hold the pipe cleaner skeleton together.
Glue (Tacky glue is used on all parts of this project) the end of a long piece of bias tape to the back of the pipe cleaner torso just under the shoulders. Wrap the shoulders and torso with the bias tape, then the upper legs, then the torso again. Cut and glue the end on the back. This bias tape will not show under Miss Hickory's costume.
Glue (Tacky glue is used on all parts of this project) the end of a long piece of bias tape to the back of the pipe cleaner torso just under the shoulders. Wrap the shoulders and torso with the bias tape, then the upper legs, then the torso again. Cut and glue the end on the back. This bias tape will not show under Miss Hickory's costume.

Hickory nuts come in a variety of shades of brown. I try to match the embroidery floss and bias tape to the color of the hickory nut. (See Part 4 for the hickory nut head, which goes on last, after all the clothes have been fitted and applied.)


Thea, Miss Hickory is just delightful. What does your daughter think of her?
ReplyDeleteYour instructions are superb and I'm going to give her a try, although I don't recall ever seeing Hickory nuts here in New England. Well, I'll check out a potporri mix and if that doesn't turn up something, there is always paperclay... Thanks for the tute! Mary Ellen
This is absolutely adorable and very clever. I hope you don't mind if I share your link to this tutorial on my blog. I am trying to do an ongoing list of great tutorials.
ReplyDeleteI also love the concept of you blog. What a wonderful tribute.