Monday, February 8, 2016

What's old is new again, just smaller (and prettier)

Remember those large hanging flower baskets we made with macramé in the 1970's? Macramé is back again, and it's much finer looking now.  I have seen several books on 'micro macramé,' with beautiful jewelry designs.  Several years ago, at the big bead show in Tucson, I purchased several spools of C-lon thread, which I used to start a macramé project in the Cavandoli technique, but I didn't like the way it looked (a different thread would look better).  C-lon, which is a nylon thread, comes in lots of colors!
 
I recently purchased a book, 'Micro Macramé Basics and Beyond,' by Raquel Cruz.  The book has many lovely jewelry designs in it.  So I was inspired to get the C-lon out and give it another try.  While the book is colorful and inspiring, I found it a little difficult to use.  There are only six pages of basic knot illustrations, and they are photographed in a single color.  Using two contrasting colors would have made the diagrams easier to follow.  But no matter, I'm inspired, and I have another book, a really excellent book with wonderful diagrams for many, many knots, basic and advanced.  (The book on the left, below, 'Decorative Knots for Jewelry and Accessories,' by Boutique-Sha).
 
I like the way the book, on pages 6-9 has a visual index of all the knots covered in the book (practical and decorative): 

The diagrams, shown in contrasting colors, are very easy to follow.  I also like that the author gives several uses for each knot, as well as approximately how much thread you will need for a six inch sampler.  (My wrist is 6", so that is handy because I like to make bracelets.)

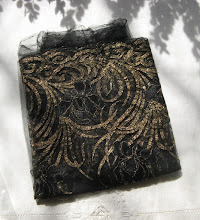
Both books are available at Barnes and Noble online.  The third book in the picture above was probably purchased at Kinokuniya, my favorite book store in NYC, behind Bryant Park.  They have an amazing craft book section, most of the books entirely in Japanese, but the photographs and illustrations are usually so excellent that an experienced crafter can figure out how to make the projects.
 
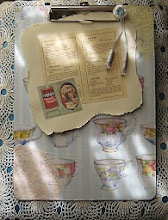
Here is what I have been making with the C-lon thread and colorful beads found at Joann's.  (Displayed in front of my Betsy McCall house).
 
 
It looks like I have made eight bracelets, but it is only five bracelets.  One of the very clever ideas from 'Micro Macramé and Beyond' is to make a bracelet that is 12" rather than 6".  You change to a different design after the first 6", either adding new threads or switching the core and knotting thread placement.  (If you right click on a picture and open it in a new tab or window, you can see it in close up detail.)
 
This is one bracelet, two different knotting techniques:
 
Since I cannot copy directions or illustrations from any book to put in my crafty blog, I created my own directions for square knot and alternating half hitch both, both of which make nice cords for bracelets.  It is easy to add beads to the square knot to dress it up.  Bracelets 4,5 and 8 (above) were made with the square knot.  I like to use two or more different colors in most bracelets.  In addition to the thread you will need a clipboard and a binder clip.
 
Make an overhand knot with the core thread (core threads will be inside the square knots). 
 
Attach the knotting thread to the core thread with a square knot. 
 
Switch one of the core threads (pink) with one of the knotting threads (maroon) for a two color finished cord.
 
SQUARE KNOT.  Core thread is held taught at the bottom of the clipboard with a binder clip.  Take the thread on the left and lay it over the two core threads.  Lay the thread on the right over the thread from the left.  It will look like the number 4. 
 
Bring the pink thread on the right under the core threads and up through the loop made with the thread on the left.
 
Repeat the process in the reverse, with the number '4' facing the opposite direction.
 
 
ALTERNATING HALF HITCH.  Makes a nice, bumpy type of cord.  Switch the threads again so the two pinks are together and the two maroon are together.  Holding the left threads taught (you don't need to use the binder clip), wrap the right (pink) threads over and under the taught threads and through the loop you just created.
 
Pull the knot up and tighten it.
 
Repeat the process in reverse, holding the right thread (pink) taught, and wrapping the left thread over, under and through the loop.  This cord works up very fast, and looks nice in a bulky thread.
 
The square knot and alternating half hitch detail.  These are very easy knots to teach to children.

I think the C-lon thread (used in the bracelet samples above) looks sophisticated enough for anyone to wear!
 

Tuesday, September 30, 2014

Embroidering with Vintage Emphemera

Vintage ephemera is so charming -- postcards, trade cards, adverts, magazines.  And I have a LOT of it.  It is interesting and fun to see what was popular 100 years ago.  But I sometimes think I should use my collection more in crafting, rather than just enjoying the colorful art and illustration.

I have a few sets of these sweet Arm & Hammer "Useful Birds of America" cards from a century ago.  This is Bullock's Oriole, a bird I have never seen (their range is West of the Mississippi).  But I thought it might make a colorful, embroidered brooch.

 
I scanned and printed several cards onto a Printed Treasures Printer Fabric Sheet by Prym Dritz.  (Note: these fabric sheets are a bit expensive, but you can also make fabric that will run through your printer using 8 1/2 x 11" freezer paper adhered to a fabric appropriate for crafting -- I have used this method with good results.  Click here for link.)  I used colored pencils to enhance some of the areas that wouldn't be over embroidered, such as the blue sky and the branch and leaves.
 
Because I wanted to save space and print several pictures onto the fabric, there isn't much space around each picture to hoop the fabric for embroidering.  So, I left the paper on the back of the printed fabric.  I lightly penciled an oval around the selected bird, the size of the pin I wanted to make.  Here is the embroidery started.  I used one strand of six-strand embroidery floss.  Most of the stitches I used were long & short, with a few French knots.
 

The penciled oval frame was embroidered with a small chain stitch.  The finished embroidery, front and back:
 
 
Cut the paper away outside the stitched oval.
 
Trim the fabric about 1/2" beyond the frame.  Run a doubled gathering thread 1/8 " from edge of trimmed fabric.  Cut two pieces of thin cardboard the shape of your oval pin. 
 
On one piece of cardboard lightly glue a small oval of thin batting.  On top of that lightly glue a second piece of thin batting, cut the size of the cardboard.
 
 
Insert batting-covered cardboard inside embroidery and pull up gathers tightly.
 
With Beacon FabricTac glue pinback to the second piece of cardboard.  Mark a small scrap of Ultrasuede where the hinge and hook will come through the Ultrasuede.  Cut two small slits where the marks were made.
 
Using Beacon FabricTac, cover cardboard and flat part of pinback.  Press Ultrasuede firmly onto the cardboard.
 
When glue is thoroughly dry, trim Ultrasuede.  I also like to color the edge of the cardboard oval.  This may be a little ocd tidy.
 
Place the embroidery face down on a towel.  Spread glue on back of the Ultrasuede oval.  Press it down really hard on the back of the embroidered piece.  Really hard.  You want the edges of both pieces to firmly adhere to each other.  That is why I use a towel, so the embroidery will not flatten under pressure. 


Here is the finished embroidery.  I think it came out fairly well, for a first attempt.   The pin measures 1 3/4" wide.
 
Some more birds from the set: 


Friday, September 12, 2014

When Bad Things Happen to Good Things

Martha used to be my Queen of Crafts.  Her television show, the old one, featured classy, useful and fun demonstrations on cooking, gardening, collecting, and crafting.  (I learned how to wire a lamp on her show!)  The magazine had beautiful photography and was full of creative ideas for making home a colorful and comfortable place for me and my family. 

Well, I know Martha doesn't care about me anymore.  It's not personal, it's my age bracket.  You have to keep reaching for that younger audience, I understand.  But Beauty and Style pages?, there are so many other "women's" magazines that provide this kind of information.

Lately, the articles and ideas in Martha's magazine just haven't inspired me like they used to.  In the past I could always count on the "Good Things" section in each issue for quick and clever craft projects.  Ok, occasionally they didn't hit the mark as being especially clever.  But in the most recent issue one of the Good Things has kind of taken a plunge over the edge, and become a very Silly Thing.  I speak of the rock star necklaces. 

Firstly, the photograph in the magazine does not show the necklaces actually being worn, so of course the photographer has styled them to look attractive.  I couldn't tell from the photograph or instructions what size the rocks might be.  But, gee, I love to collect rocks when I am traveling (never from any place where collecting is not allowed).  So, although skeptical, I thought to give it a try.

I used a pretty variegated embroidery thread to wrap around the small stone:

 
The thread kept wanting to come away from the stone.  Gluing neatly is not easy. 

But I give it a go....
 
Oops......  
 
More secure if wrapped horizontally, but not so pretty: 
 
Now I'm being silly (but it's a silly idea!).  What about all those larger, pretty stones one picks up while traveling, beachcombing, hiking?  I used Paracord for this one. 
 
Clunk!
 
Here is what a friend of Mom's did with a pretty rock she found on the beach -- polished and glued it to a silver bail, then attached to a silver chain.  Classy.
 
I really miss the Martha of ten years ago, when she and her editors published the best magazine on the market for living the creative life.  Where did all those excellent craft, collecting, gardening, food, photography, etc. editors go?  Sigh.  If I want a really good home/living magazine these days, I drive 70 miles to Memphis and buy a magazine from France, Marie Claire Idees.  Sadly, I cannot read French, but the excellent photography tells the whole story, and Google translate can help with the recipes!


TUTORIALS & PATTERNS

There are many tutorials and patterns in previous blog posts, but it isn't always easy to find them.  So here is a list and links to various older posts which contain tutorials and free patterns.  And hopefully more to come.  I'm also going to put a 'gadget' on the right with direct links to various tutorials and patterns.

I-Pad or Keyboard Cover -- http://emmamyrtle.blogspot.com/search/label/Apps  A sewing project for dressing your electronics for success! 

Fabric Yo-Yo Valentine Pin  -- http://emmamyrtle.blogspot.com/search/label/Art%20Vending%20Machine  (Scroll down through this long post for the yo-yo pin pattern and directions.)

Easy Coiled Basket -- http://emmamyrtle.blogspot.com/search/label/Basketry  There is a link in the post to my two page Google Document with step-by-step photos and directions for an easy coiled basket made with clothesline and yarn. 

Beaded Button Brooches -- http://emmamyrtle.blogspot.com/search/label/Beaded%20Button%20Brooches   Instructions, diagrams, button suggestions, sample pictures.  Follow the directions to link to my Flickr Photostream for a 3-page handout of instructions, plus diagrams for many beaded edging stitches, or just click right here. 

Felted Beads, Tubular and Spherical -- http://emmamyrtle.blogspot.com/search/label/Beads%20%28felted%29  Achieve perfect spherocity (?) using an old tea strainer to wet felt a round bead!

Felted Headband -- http://emmamyrtle.blogspot.com/search/label/Felted%20Headband  Note of apology -- I consider this project only mildly successful!

Beaded Row Counter -- http://emmamyrtle.blogspot.com/search/label/Beaded%20Row%20Counter  Cute idea, and instructions, for creating a piece of 'jewelry' that helps you count rows of knitting. 

Lulu's Christmas Corsage and Felt Stocking Brooches -- http://emmamyrtle.blogspot.com/search/label/Christmas%20Craft  Lulu's Christmas Corsage is more idea than instructions, but there are some good ideas, including making a tiny birch bark bird silhouette.  The felt stocking brooches are small and colorful, and about 20 of them decorated the Christmas lapels of nursing home residents several years ago. 

Crazy Quilted Velvet Beret -- http://emmamyrtle.blogspot.com/search/label/Crazy%20Quilting  This tutorial includes instructions and tips for designing and piecing, crazy quilt style, for those who aren't quite comfortable with the improvisational nature of the technique!  Plus directions for putting the beret together.  But the beret pattern itself is not included.  Patterns for berets are readily available. 

How-To Display a Special Hat Collection: Dressing Up Styrofoam Head Mannequins --   http://emmamyrtle.blogspot.com/search/label/Display%20Tips  Start with inexpensive Styrofoam head mannequins and dress them up to display your special hat collection.

Miss Hickory Doll -- http://emmamyrtle.blogspot.com/search/label/Miss%20Hickory%20Doll
Miss Hickory, by Carolyn Sherwin Bailey. This charming book, about an independent minded little doll made from a hickory nut and applewood twig, was a Newberry Award Winner in the late 1940's.  Instructions and patterns for Miss Hickory adaptation in 4 parts. 

Needle Felted Tiny Dog -- http://emmamyrtle.blogspot.com/search/label/Felted%20Toys  Inspired by Gretel Parker's article in Mollie Makes, Kathy shows how she made her dog, Sadie, with plenty of photos and instructions.

Blocking a Baby Sweater -- http://emmamyrtle.blogspot.com/search/label/Knitting%20Tips  Scroll past the knitting pattern links to see Kathy's tips for blocking little sweaters.)

'Lulu's Garden' Fascinator  http://emmamyrtle.blogspot.com/search/label/Millinery  These four posts include ideas and tips for making a 'scenic' fascinator, and also include directions for making the two tiny dolls that inhabit the garden hat. 

Felt Flowers for a Fascinator -- http://emmamyrtle.blogspot.com/search/label/Felt%20Flowers  A mini tutorial on making flowers from three small pieces of felt.  From a Mollie Makes kit, for a necklace, but I chose to make something very different.

Pin Weaving -- http://emmamyrtle.blogspot.com/search/label/Pin%20Weaving  This post will get you started in designing a small pin-woven necklace or purse.  Follow the links for further directions and inspiration. 

Old Fashioned 3-D Valentine -- http://emmamyrtle.blogspot.com/search/label/Valentines  Make a vintage valentine for your mother, aunt, sister, friend.  Simplified directions, but plan to spend a few hours creating yours.  It helps to have LOTS of paper craft supplies -- stickers, doilies, tissue paper, cardstock, bits of lace, poems, alphabet stickers, glitter, and ephemera.