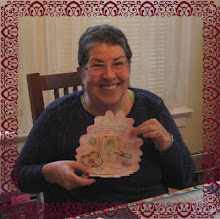
My mother, Lulu, had a pretty good wardrobe of hats the last decade or so of her life. We invited people to take one of her hats at a reception we held in her honor after she passed away, and several people took a hat to remember Lulu by.
Here is Lulu in a hat that I now wear.
And here is a photo of Lulu, wearing a cute little pink number, sitting on Tom's bike in 2003. She looks very cute, like she is really ready to take off on that thing! There is a funny story behind this photo. I can send extra photos if requested.
Lately I have been building up my wardrobe of hats, having inherited Lulu's thinning hair genes. This past summer, on my drive up north, I stopped in Granville, Ohio and took a felt hat making class with Gail Maraman of Windy Crest Designs - click here. Gail is an artist in felt, and teaches classes in the history, culture, nature, and art of feltmaking, as well as the techniques for making traditional felt, nuno felt, watercolor felt, and needle felt.
I got a good start on my hat and finished it when I got home a month later. I did some more felting on the hat and realized it had shrunk more around the circumference, but the crown was a little tall. After I had needle felted yarn embellishment to the hat, to reduce the height of the hat I pinned folds into it, then starched and steamed it. After it had dried, folds intact, I then added a few beads and sequins. A buttonhole stitch was embroidered all around the edge of the brim. I like the way it turned out! Next year, on my way up north, I'm going to take more classes with Gail!
Wednesday, November 30, 2011
Crazy Quilted Beret - Crazy Quilting for the Improvisationally Challenged!
I love berets and have wanted to try crazy quilting for a long time. The front of the velvet beret:
The crazy quilting part of the beret:
Starting with a vintage Vogue pattern, 9094, which I purchased a long time ago for $2! I made it up several years ago, in wool. It was a tiny bit too small, so I enlarged the pattern, using my printer, up to 105% of original.
I divided the top of the beret pattern into four sections. It seemed less frightening to create a crazy patchwork when I broke it into several sections. I then drew and colored in a patchwork design in each quarter section, lapping some of the pieces over into the next quarter so it wouldn’t look quite so contrived. I know this defeats the improvisational nature of crazy patchwork, but improvisation is not a strong point of mine. (I enjoy being inside the box, it’s cozy and comfortable in there!)
The patchwork design was traced onto a loosely woven background fabric and then onto lightweight fusible interfacing:
Cut the pieces of the interfacing and lightly fuse them to the back of velvet scraps. Trim around the interfacing, leaving 1/8” extra all around. I don’t cut all the pieces at once, it could get difficult to figure out where they fit into the crazy patchwork puzzle.
Pin the cut pieces to the background fabric, overlapping over each other by 1/8":
Machine baste the patchwork pieces to the background fabric, using a long zigzag stitch, and attaching each piece to its neighbors. Here it is with the zigzag basting completed:
I used Sulky invisible thread for the machine basting. It would be impossible to match the thread to the fabric pieces, and the invisible Sulky worked very well in my sewing machine, with invisible thread on the top and a cotton/poly thread in the bobbin. I also used Sulky invisible for attaching the beads after the embroidery was completed. Some sewers do not like to use this product, but I use it often and have a good trick for making it a little less frustrating. Because the thread slips out of the needle very easily, I tie a surgeon’s knot right at the needle. This holds the slippery thread in the needle and it goes through any kind of fabric easily. You have to move the knot up as the thread length gets shorter.
Margot situated herself in my box of embroidery threads and beads. I put them in the box so she wouldn’t knock them off the table! Oh well.
Detail of some of the embroidery stitches:
I love my old Coats & Clark “100 Embroidery Stitches” booklet. It’s the best! It was fun to explore some stitches I had not used in years. You can still find this earlier version of the booklet (and a newer one) on EBay, Amazon, etc., but not for 35¢!
Embroidery don'ts: It was a real challenge to work some of the embroidery on the piece. I don’t think I will do another crazy quilted project using velvet. Too thick (sometimes there were 3 layers of fabric to go through, two of velvet and one background fabric). In some places I had to use pliers to get the needle through the layers! Also, I like to use materials that I have on hand, and I have a small box of embroidery threads collected and partially used over the years. Very neatly organized into colors, a little baggy of reds, another of yellows, etc. Unfortunately, the quality of these old scraps of threads was inconsistent! Only one skein of floss I used was perfect, like gliding the thread through butter. This was a new skein of DMC variegated floss, the gold in the lower left corner. Next time, all new threads!
Next post, finishing the beret.
The crazy quilting part of the beret:
Starting with a vintage Vogue pattern, 9094, which I purchased a long time ago for $2! I made it up several years ago, in wool. It was a tiny bit too small, so I enlarged the pattern, using my printer, up to 105% of original.
I divided the top of the beret pattern into four sections. It seemed less frightening to create a crazy patchwork when I broke it into several sections. I then drew and colored in a patchwork design in each quarter section, lapping some of the pieces over into the next quarter so it wouldn’t look quite so contrived. I know this defeats the improvisational nature of crazy patchwork, but improvisation is not a strong point of mine. (I enjoy being inside the box, it’s cozy and comfortable in there!)
The patchwork design was traced onto a loosely woven background fabric and then onto lightweight fusible interfacing:
Cut the pieces of the interfacing and lightly fuse them to the back of velvet scraps. Trim around the interfacing, leaving 1/8” extra all around. I don’t cut all the pieces at once, it could get difficult to figure out where they fit into the crazy patchwork puzzle.
Pin the cut pieces to the background fabric, overlapping over each other by 1/8":
Machine baste the patchwork pieces to the background fabric, using a long zigzag stitch, and attaching each piece to its neighbors. Here it is with the zigzag basting completed:
I used Sulky invisible thread for the machine basting. It would be impossible to match the thread to the fabric pieces, and the invisible Sulky worked very well in my sewing machine, with invisible thread on the top and a cotton/poly thread in the bobbin. I also used Sulky invisible for attaching the beads after the embroidery was completed. Some sewers do not like to use this product, but I use it often and have a good trick for making it a little less frustrating. Because the thread slips out of the needle very easily, I tie a surgeon’s knot right at the needle. This holds the slippery thread in the needle and it goes through any kind of fabric easily. You have to move the knot up as the thread length gets shorter.
Margot situated herself in my box of embroidery threads and beads. I put them in the box so she wouldn’t knock them off the table! Oh well.
Detail of some of the embroidery stitches:
I love my old Coats & Clark “100 Embroidery Stitches” booklet. It’s the best! It was fun to explore some stitches I had not used in years. You can still find this earlier version of the booklet (and a newer one) on EBay, Amazon, etc., but not for 35¢!
Embroidery don'ts: It was a real challenge to work some of the embroidery on the piece. I don’t think I will do another crazy quilted project using velvet. Too thick (sometimes there were 3 layers of fabric to go through, two of velvet and one background fabric). In some places I had to use pliers to get the needle through the layers! Also, I like to use materials that I have on hand, and I have a small box of embroidery threads collected and partially used over the years. Very neatly organized into colors, a little baggy of reds, another of yellows, etc. Unfortunately, the quality of these old scraps of threads was inconsistent! Only one skein of floss I used was perfect, like gliding the thread through butter. This was a new skein of DMC variegated floss, the gold in the lower left corner. Next time, all new threads!
Next post, finishing the beret.
Crazy Quilted Beret - Putting it Together
Embroidery and beading complete, trim the excess background fabric:
Check to make sure the finished top is pretty close to the size of the original pattern piece, and trim if necessary:
Measure and trim the pieced bottom of the beret, too:
Pin crown to bottom of beret….
...and stitch all around. Trim seam to about 3/8”:
Lining, pinned, then stitched all around:
After the lining is stitched, place it inside the hat (wrong sides facing), and pin the lining, hat, and a length of ribbon together, and sew all around. The ribbon is pressed to the inside of the hat and tacked down (to the lining) in a few places. I didn’t want to iron on the velvet so decided to tack the ribbon to the hat using beads sewn all around the hat about 1/8 to 1/4" from the edge. On the green section I used green beads, red section / red beads, etc. I like the way it turned out.
Finished crazy quilted beret, from the back. Can’t wait to wear it to tea!!
Embellishing a Hat
What's wrong with this hat? Did the manufacturer forget to finish it? I don't think so. I purchased this hat in a well known department store (begins with a capital "T"), and the hat is by a famous millinery designer I had not heard of until I saw the magazine advertisements for his line of hats, to be sold at the famous department store starting October 29 for $20 each. Of course, the first time I was in Memphis after October 29 (my small town is not large enough for two famous department stores, only the awful one) I had to go check them out. I bought three, they are really quite nice. I liked the way this one fit, but thought the decoration was a little.....well, young and hip. Which I am not. But I knew I could have fun with it and make it into a hat that I really liked.
I remedied the 'unfinished' nature of the hat by sewing a wide ribbon on the half of the hat that was ribbonless. Then I applied old black lace all around the hat, a narrow ribbon above the lace on one side, and a narrow black trim attached with beads on the other side. I finished it with a large ribbon flower and cockade near the front of the hat, and velvet leaves toward the back to cover the break in the decoration.
I really like the two different, but similar, sides of the hat.
Button Fabric, Sewn Hat
Displaying Special Hats - Decorative Head Mannequins
I have a couple very special hats, and for these I created a special way to display them. Here is a 1920's cloche, probably given to me by my mother 40 years ago. It is very fragile and cannot be worn. I purchased an inexpensive styrofoam head and painted it with several layers of Gesso; the last one or two layers I added a touch of color by mixing in some acrylic paint. I used a little powder rouge on the cheeks.
The wooden base was painted in a color similar to the hat. I then gave the head a necklace, using some antique beaded trim. The ribbon ornament, looking sort of like a bowtie, was made using Candace Kling's wonderful book, The Artful Ribbon.
Here is another special head mannequin. This time I strung beads and pinned them to the styrofoam (in case I need them later for another project!)
Here is a most special hat, one my mother wore in the 1940's. She loved this hat and kept it all those years. When she gave it to me I tried it on, and it was very small! I made this special head mannequin and put it on it, and it fit perfectly and made the hat look just right. Once again, the head and base were painted, with a necklace attached. The scarab pin my father brought home from Africa, where he was stationed in WWII.
A photo of Lulu wearing the hat, and my father, in his Army Air Corps uniform. My mother told me a sad story was behind the photograph, as they were attending the funeral of a college friend of my father. He was a training to be a pilot in the Army Air Corps, and died in a plane crash. I cannot imagine living during WWII, but my mother told us many interesting (and sometimes sad) stories about the experience. They sacrificed a lot for us.
My house is very dusty. I devised a way to keep dust off some of textiles. I use the many MANY vintage hankies I have collected over the years. When a guest stays in this room, I remove the hankies. It's easier to shake the dust from a hanky than it is a hat.
Subscribe to:
Posts (Atom)