Understanding exactly what my friend wanted to try and make took a bit of exploring on the web. Once I realized what she wanted to make I was excited to make one for myself too. It seemed that making a chain of jump rings large enough to slip onto your needle was the basic premise, and then you could embellish to your heart's content!
I took a trip into the city to get supplies. I was headed to Beads World on Broadway, but wandered into another great store, Bead Empire at 39th and Avenue of the Americas. Both stores have great inventory and customer service. I didn't realize there was this whole "beading district" within the Fashion District - there were several other beading stores within this 2 block radius! At Bead Empire I purchased the jump rings, crimp beads, and drop bead posts I thought we would need. Just as I was getting ready to leave I happened to glance at a wall that had spools of already-made chain on it and saw this:
 Tah-dah! Suddenly this seemed like a MUCH better idea. I bought all the other bits and pieces anyways - you can never have too many crafting supplies :).
Here are a couple of pictures of the embellishment I made to attach to the end of the chain - it looks like it might be heavy, but all of these beads were actually quite light-weight. These are just stacked onto a drop bead post (I think that is what you call it!) with a couple of small spacer beads here and there.

 The mathematical mechanics of the counter are simple - the chain is 20 rings long - 10 small and 10 large. Depending on the size needle that you are using, you simply slip a ring between two stitches, and as you are knitting you simply move to the next ring down on the chain each time you pass over it as you knit. So that will get you through 10 rows. And what if you need to count more than 10 rows? That's where this bit comes in:
For the first 10 rows you would leave this off of the chain. When you get to the 11th row, you attach this counter using the lobster clasp onto the 1st large or small ring - whichever size you AREN'T using to fit your needles. Then you start counting your next set of 10 rows. Here's a picture of the counter showing knitting at row 11.

And here is a picture of the counter showing knitting at row 14.

You would leave the lobster clasp embellishment in place attached to the 1st ring for 10 rows, and then bump it down to the next large or small ring (depending on which size DOESN'T fit your needles). With this method you should be able to count to 100 rows. Actually, I guess 110...
This part still needs a little bit of work. I wanted the lobster clasp to be easy to open and close so I used a large size, but the clasp is a bit too heavy. I think a medium clasp will be fine, I just didn't have one in my beading supplies. When I get down to the Bead District again I will pick one up. One parting artistic shot - all taken with my cell phone cam, btw!

I always seem to need a food reward for my projects - hmmm. That explains a lot. Anywho, today I made Almond Poppyseed Bread. Delish!

.jpg)
 Both Allison and Susan were instructors at AFIC. It is very hard to choose which class to take! Susan's 'folk art' figures and dolls are really different, and beautifully painted in a primitive/modern kind of way.

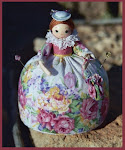
 This Navajo Pin Poppet was made for one of the raffle baskets at my sister's guild fashion show a couple years ago. And the one below was made for a friend's daughter's school raffle.
 The little (3 1/2") pincushion doll has a needlecase inside, and the doll comes apart at the waist. A good place to store those precious, specialty needles.
 The first step is to select some lace trims, ribbons and buttons to cover the glass vial. Using Fabri-Tac glue, adhere a piece of lace to the top and bottom edges of the vial. Let dry a few minutes.
 Something has to be added behind the decorated vial, otherwise the pin wants to flop to the side when you wear it. To fix this problem you can either add a ribbon or lace bow (glue it over the pin back) or make a felt leaf to attach to the pin. I used a fusible adhesive to attach buckram to the back of the felt, to give it body. The leaf is a tulip poplar, which I hand sketched from an illustration on the internet. Transfer the sketch to the back of the buckram/felt sandwich and cut it out. I painted the edge of the leaf with fabric paint. It is hard to see, but I also painted lines, using a Micron Brush marker, on the felt to resemble the veining on the tulip poplar leaf.
 Instead of sketching a leaf, you can always go outside and find a leaf that is the right size and shape and simply trace around it onto the buckram. Here is a redbud leaf that I picked today.
 I think I got these little fabric flowers to put in the pin/mini vase at Paper Source in Porter Square, but you can find them in other places too. Or, you could pick some fresh violets or other tiny flowers, and wear them on your lapel for a fresh and friendly spring greeting. To fill the little vial with water, use a pipette, or one of those little coffee stirrer straws.


