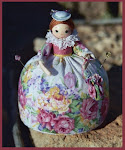
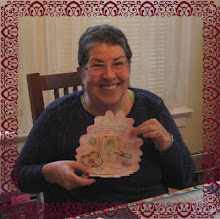
Here is a brooch I made out of a keyhole I found at a flea market in France three years ago. I made the pin in the same way I make the beaded button brooches. I miniaturized a photo of Lulu taken at Elizabeth Park Rose Garden in Hartford, about 90+ years ago. When my sister and I went to France last year, Lulu went with us in the form of a pin!
 Here are a couple diagrams for some of the beaded edgings I have used on my beaded button brooches. There are many more diagrams on my Flickr photostream. Students can click on the picture of the beaded cat button (on the right) to go to the Flickr photostream. When you get there, click on the set "Beaded Button Instructions." Here you will find a 3-page handout of directions, plus diagrams for all the beaded edgings I have created. You can download the instructions, diagrams and pictures and then print them.
 The button below was the second one I made after learning the technique from a Bead & Button article. (My technique is pretty different, and all the edgings I use were created by me.) The small buttons are called "calicos" and were made in the mid-19th century. There is a nice article about them in Bead & Button magazine online.
 Here is a beautiful reproduction Czech glass button:
+of+IMG_5238+Green+Button,+Purple+Edging+RESIZED.jpg) Here is a sample of one of my beaded button brooches. To see more samples, click on the slide show of beaded buttons (on the right, the beaded cat button picture).
Here is a sample of one of my beaded button brooches. To see more samples, click on the slide show of beaded buttons (on the right, the beaded cat button picture). Buttons old, new, plain, fancy, solid color or patterned -- they all work. The vintage button in the upper left of this photo was recently given to me by a friend. I can't wait to make it into a pin. It's so me, the pink gloved hand, holding the big rhinestone! The bottom left button was recently purchased, at M&J Trimming in NYC. The button on the right is from Africa.
 Lastly, if you want to spend a lot of money, you can find reproduction Czech glass buttons online. The glass dragonfly button, below, was purchased at the big bead show in Tucson last February, and it cost about $10. I think the "work in progress" button is funny; I found it at M&J Trimming on my recent trip to New York City. The soft pink button in the center is plastic.
 Remember, 1" or larger. See you on the 22nd!
 Tah-dah! Suddenly this seemed like a MUCH better idea. I bought all the other bits and pieces anyways - you can never have too many crafting supplies :).
 The mathematical mechanics of the counter are simple - the chain is 20 rings long - 10 small and 10 large. Depending on the size needle that you are using, you simply slip a ring between two stitches, and as you are knitting you simply move to the next ring down on the chain each time you pass over it as you knit. So that will get you through 10 rows. And what if you need to count more than 10 rows? That's where this bit comes in: