I made a stack of ribbon flowers to place on the fascinator -- folded roses, gathered roses, pansies, etc. -- from a variety of ribbons, including sheers & wire edged (both ombre & patterned), picot edged, grosgrain, old seam tape, lace trims, etc. There are also a few small paper flowers on the hat, both vintage and new.
 There are a couple favorite books which I use when making ribbon flowers. I especially love Candace Kling's "The Artful Ribbon." Her pansy instructions are superior! Of course I can't reproduce the instructions here, but go to Candace's website to be inspired! She teaches mostly on the west coast, and I was fortunate to take a weekend of classes with her when I lived in San Diego. Candace's book is available through many sources.
Another favorite author is Helen Gibb, who has several books on the subject of ribbon flowers and what to do with them. I used to see her fairly frequently when Carol Duvall was still hosting a craft show on HGTV, and you can still access some directions by going to HGTV and doing a search. Helen uses ribbon flowers to decorate many things besides hats! And she offers the most luscious selection of ribbons on her website; wouldn't it be nice when we find a great supply source to be able to just blow a couple hundred dollars at the snap of a finger?! Sigh.
Here are my directions for making a daisy-like flower, below. I developed my own method for this flower because I wasn't quite satisfied with directions I found, in both new and old books, for making a multi petaled flower.
Make a soft knot about every two inches on a narrow piece of ribbon. Most of the books tell you at this point to run a gathering thread every two inches between the knots, then to pull up the length of the ribbon. For me, this approach makes a somewhat disheveled looking daisy! So, after knotting the length of ribbon, I instead tack each petal individually, between the knots, to a small circle of buckram, making a pretty arrangement as I go along. And if you haven't made enough knots but still have a tail of ribbon hanging, you can add more to round out your perfect daisy.

Here it is, my perfect, bright orange daisy! In a color which I have not seen in nature. One of the best pieces of advice I received in Candace's class was to stop fussing about botany, because ribbon flowers are not intended to duplicate nature. She may have said this to me because I was obsessing about my awkward roses. Practice practice -- I have box of reject flowers!
I wanted my mother, Lulu, to be watching over her garden fascinator, and over me, the creator! Here is how I added my mother to the hat.

I like to print some of my old photographs and scanned emphemera on fabric, for use in crafts. You can purchase prepared fabric sheets for use in your printer, or you can make your own using a high quality cotton which you adhere to freezer paper in order to run it through the printer. Above is a sheet of several photo and emphemera images printed on fabric, including a small photo of Lulu. And the button kit that will be covered with the small photo.

The back of the flower has been covered with a small circle of silk fabric, to hide the buckram. The small photo is cut in a circular shape about 1/2" larger than the button to be covered. Run a gathering thread around the edge of the fabric circle, place it over the button front, and pull up the gathers to make it fit tightly over the button front. Attach the back of the button as directed on the package.
With an awl, make a small hole in the center of the flower. Glue the fabric covered button to the daisy, pushing the shank through all layers. (Later you will run more florist wire through the shank, to attach the daisy to the hat base.) Couch beads around the edge of the covered button.
Glue is very acceptable in this project, though I also did a lot of hand sewing. The glue I use is Fabric-Tac by Beacon. It's messy, but works very well, and was used to attach all the flowers to the hat.
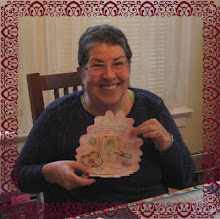
Other things I do with emphemera and photos printed on fabric. Here an ATC, one side is an old calling card enhanced with ribbon embroidery and beads, and the other side is a photograph of my mother and aunts in Elizabeth Park in Hartford, c. 1918, also embellished with beads and lace.


Next installment.....the little dolls (my sister and I in Lulu's garden).
 "Lulu's Garden" Fascinator with Flowers, Arbor, and Garden Visitors
 The dolls were made with 32 ga. florist's wire, but next time I would use Artistic Wire. I had fits trying to get the bead 'hands' and 'feet' onto the florist wire because the thread kept bunching up, even after applying Tacky Glue to the ends. This wouldn't be the case with Artistic Wire, and it also comes in lots of wonderful bright colors, and several gauges. I have used florist wire in making other tiny dolls and it works very well, especially when you are wrapping with thread to build up the anatomy (examples below).


 The hat does not just sit and stay put on top of the head. Fasten a length of narrow, round elastic at either side of the hat. This elastic is placed on the back of the head, under the hair. You then have to fiddle with the hair next to the hat, so the elastic doesn't show.


 Note the ribbon flowers, made ahead and waiting to be applied to the hat! More on flowers & dolls for the hat in my next posts. I hear a storm heading this way, so must turn off my computer!


 This photo shows how the front of the neck, or collar, didn't line up with the back of the neck. Excessively fussy for me to worry about it? Perhaps, but after all the time invested in knitting it I want the finished product to be beautiful!


 I was further inspired when we visited my daughter in New York City. Kathy patiently waited while Carolyn and I went a little crazy in our favorite NYC store, Tinsel Trading. I chose a selection of ribbons and trims in the same color palette as the jacket:
 To which I added more hot colors from my own stash:
 More later with some tips on making a wild and wacky fascinator!